Installing the kernel and drivers to get the Adafruit 2.8 inch touch screen operation was more involved than I expected, but it is working. It just need some tweaking to set it up so that the GUI can be used more easily. The RPi seems to be set up for a 1080×760 monitor but the touch screen is only 320 by 240. At least one configuration file will likely need updating to make the background and applications windows fit better.
I used the Occidentalis v0.2 kernel build as described in the Adafruit instructions for the PiTFT touch screen. The instruction have you build a new kernel so it takes a while to get it running. After building the new kernel, the Wolfram language package needs to be installed as the Wolfram language only comes pre-installed in the Rasbian distribution in the NOOBS loader. This went smoothly but I’ve had one of my CDFs crash Mathematic so some troubleshooting is still required.
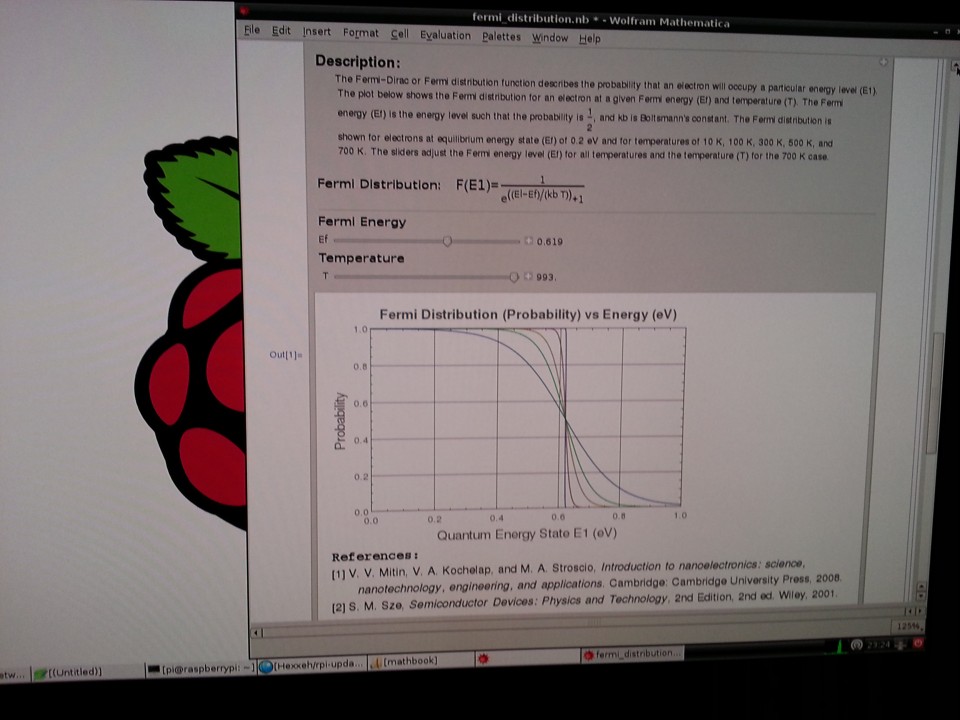
The RPi distribution via NOOBS seemed to be faster and more responsive than this version when it was first installed. The Ethernet adapter was not set up to run automatically, and the wireless interface was not configured to connect to hidden station IDs. Changes to the Interfaces configuration file enabled the Ethernet port. Later updates to this file, enabled a wireless connection too. After upgrading the packages, it seems to be much more responsive. The photos below show the display just after boot into x-windows and with the Fermi-Distribution function notebook running in Mathematica.
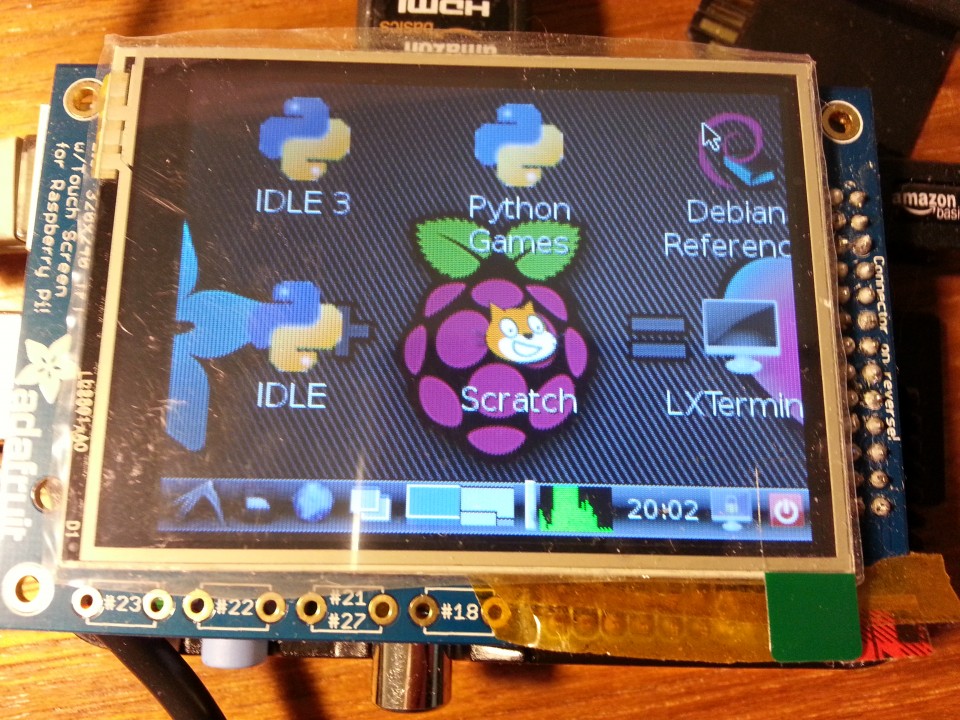
Raspberry Pi with an Adafruit PiTFT 2.8 in touch screen running in x-windows mode
Raspberry Pi with an Adafruit PiTFT 2.8 in touch screen running in x-windows mode.
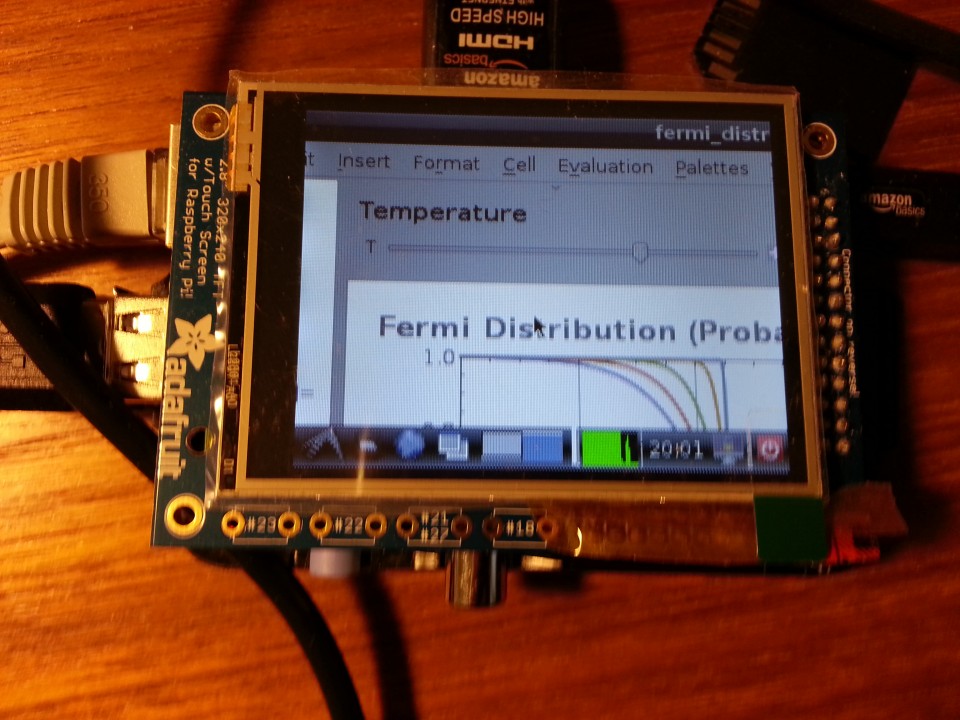
Raspberry Pi with an Adafruit PiTFT 2.8 in touch screen running in x-windows mode showing a Mathematica notebook running
Raspberry Pi with an Adafruit PiTFT 2.8 in touch screen running in x-windows mode showing a Mathematica notebook running.
It’s easier for me to use and remember operations in a GUI like Windows XP rather then a command string operation system like Linux so I keep a cheat sheet of command. These commands were used repeatedly for this activity and are listed below.
Updating the Raspbian
sudo apt-get update
sudo apt-get upgrade
Firmware updates
Updating the firmware on the RPi requires the rpi-update tool. The tool is on github along with the direction for installing it.
sudo apt-get install git-core
sudo wget https://raw.github.com/Hexxeh/rpi-update/master/rpi-update -O /usr/bin/rpi-update && sudo chmod +x /usr/bin/rpi-update
sudo rpi-update
The rpi-update will rebuild a new kernel. It might take a little while. When it completes, then reboot the RPi.
Shutdown and reboot
From an x-windows session or command line, use
sudo shutdown –h now (to shutdown and halt. Restart by cycling the power to the RPi)
 or
sudo shutdown –r now (to reboot the RPi).
Device driver location
If the build worked correctly, then /dev should contain two new SPI devices
Brian’s life blog has another good description on how to install the SPI drivers and use them.
Wireless adapter driver installation
See the eLinux.org wiki about USB wireless adapters and installing the drivers.
lsusb shows the devices connected to the USB ports
lsmod shows the modules installed
Edit /etc/network/interfaces using the nano editor and add the following if not already present for access to a hidden network (see How to setup a Raspberry Pi with a hidden network using a Edimax EW-7811Un).
auto lo
 iface lo inet loopback
iface eth0 inet dhcp
auto wlan0
allow-hotplug wlan0
iface wlan0 inet dhcp
wpa-scan-ssid 1
wpa-ap-scan 1
wpa-key-mgmt WPA-PSK
wpa-proto RSN WPA
wpa-pairwise CCMP TKIP
wpa-group CCMP TKIP
wpa-ssid “Your Wifi SSID”
wpa-psk "Your PSK Value>"
iface default inet dhcp
Then output and exit and restart the configuration
sudo /etc/init.d/networking restart
Remote access
First, generate new RSA key (see Remote Access from eLinux.org).
sudo rm /etc/ssh/ssh_host_* && sudo dpkg-reconfigure openssh-server
Then from windows, use Putty or from Linux use ssh
ssh ip-address –l username
 or
ssh –X ip-address –l username
to open using the x-windows server in Linux or a x-winders server in Windows. The x-window server must be installed on Windows first before starting an x-session.
Installing Mathematica
sudo apt-get update && sudo apt-get install wolfram-engine